Luxury Kitchen Ideas: 25 Showstopping Upgrades to Crave
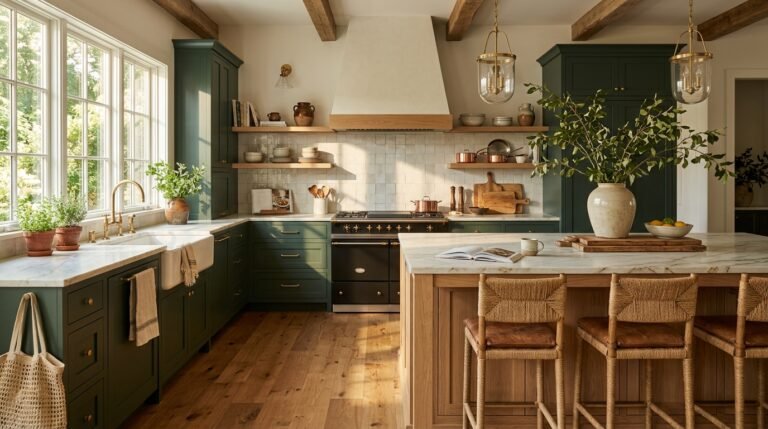
Some kitchens stop you in the doorway. The light hits the stone, the brass glows, and suddenly you want to stay all evening. These luxury kitchen ideas show you how to build that feeling in your own home, one smart upgrade at a time.
Whether you are planning a full renovation or a small refresh, this list covers 25 upgrades, from waterfall islands and statement range hoods to heated floors and warm wood cabinetry. Each one comes with practical details like measurements, materials, and common mistakes to avoid.
In my experience, the most memorable kitchens are not the ones with the biggest budgets. They are the ones with thoughtful choices. I’ve noticed that even one or two of these upgrades can change how a kitchen looks and feels every single day. Save your favorites as you scroll.
Waterfall Marble Island
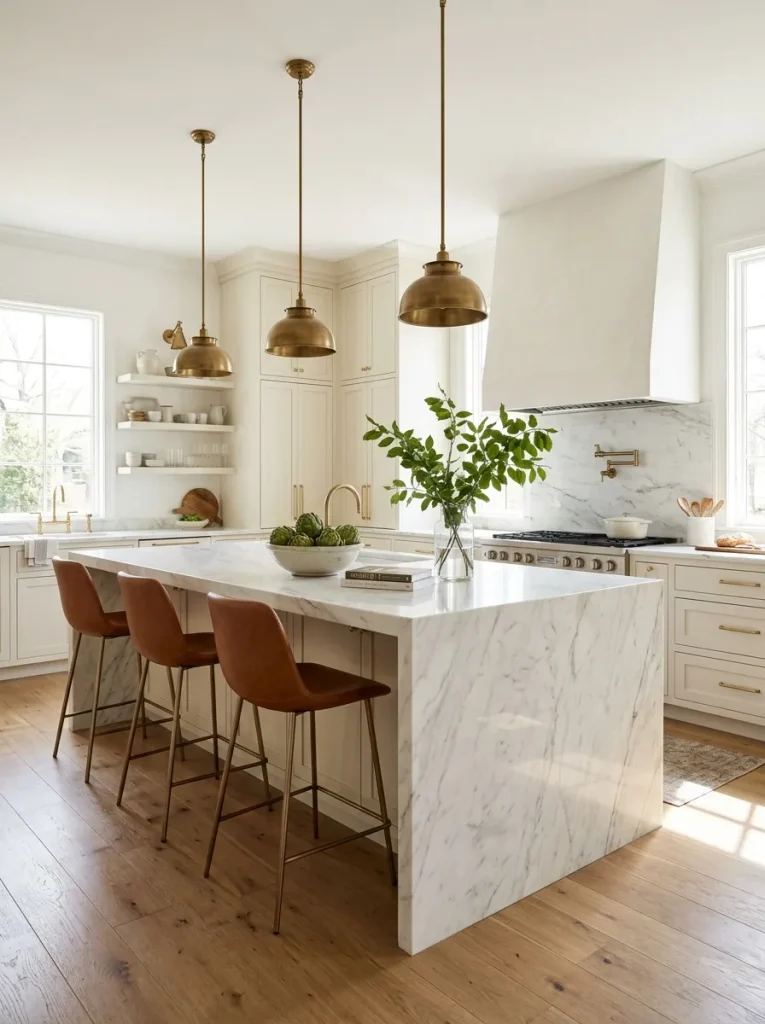
Walk into a kitchen with a waterfall island and your eyes go straight to the stone. The slab runs down both sides to the floor, so the veining flows like a frozen river. It turns a plain workspace into the focal point of the whole room.
In my experience, the details decide everything. Ask your fabricator to book match the slabs so the veining mirrors across the corner. Choose a thickness of at least 3 centimeters for a substantial edge. Seal marble once or twice a year, and wipe red wine spills quickly to avoid etching.
Glass Front Cabinets
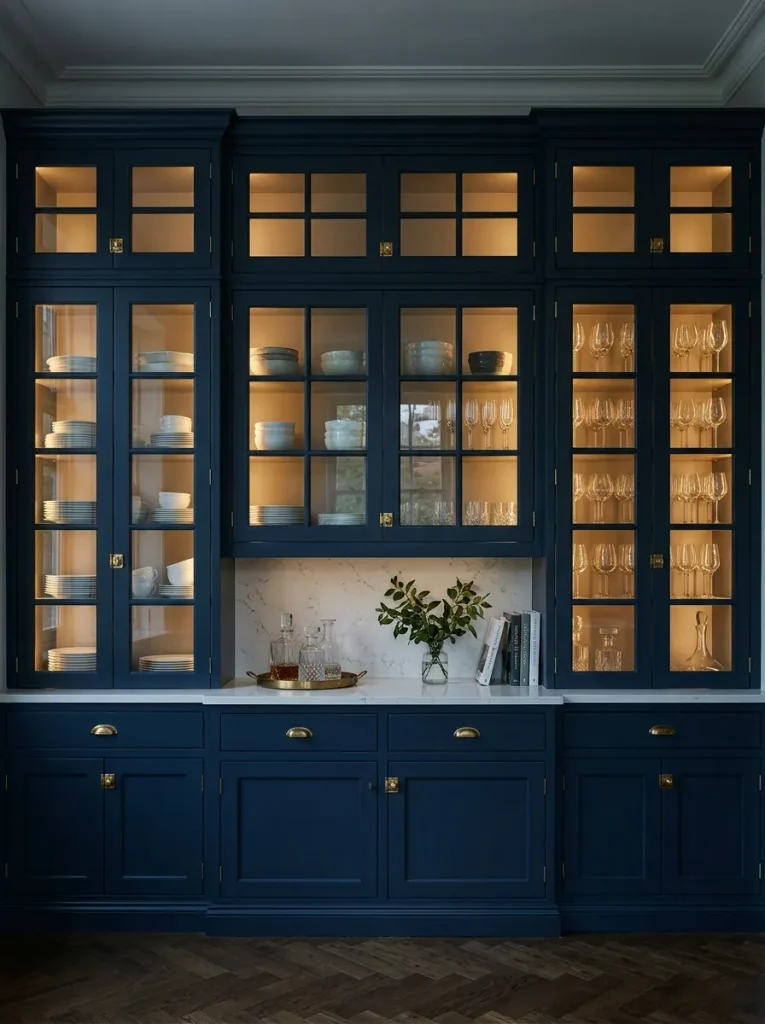
- Your favorite dishes become the decor. White plates, crystal, and matching glassware look stunning when they are on display.
- Choose clear or reeded glass based on how tidy you like to stay. Clear glass shows everything, while reeded glass softens the view and hides clutter.
- Add LED strip lighting inside the cabinet. The contents glow at night and the whole room feels warmer.
- Stick to two or three display colors so the shelves look planned rather than crowded.
- Limit glass doors to one or two sections, ideally flanking the range or a window.
I’ve noticed that glass fronts work best when the cabinet behind them is styled like a shelf in a boutique. Group items by height, leave breathing room, and keep everyday mugs in closed storage. The result feels collected and calm, and your most beautiful pieces become part of the room’s design.
Statement Range Hood
Quick Tip:
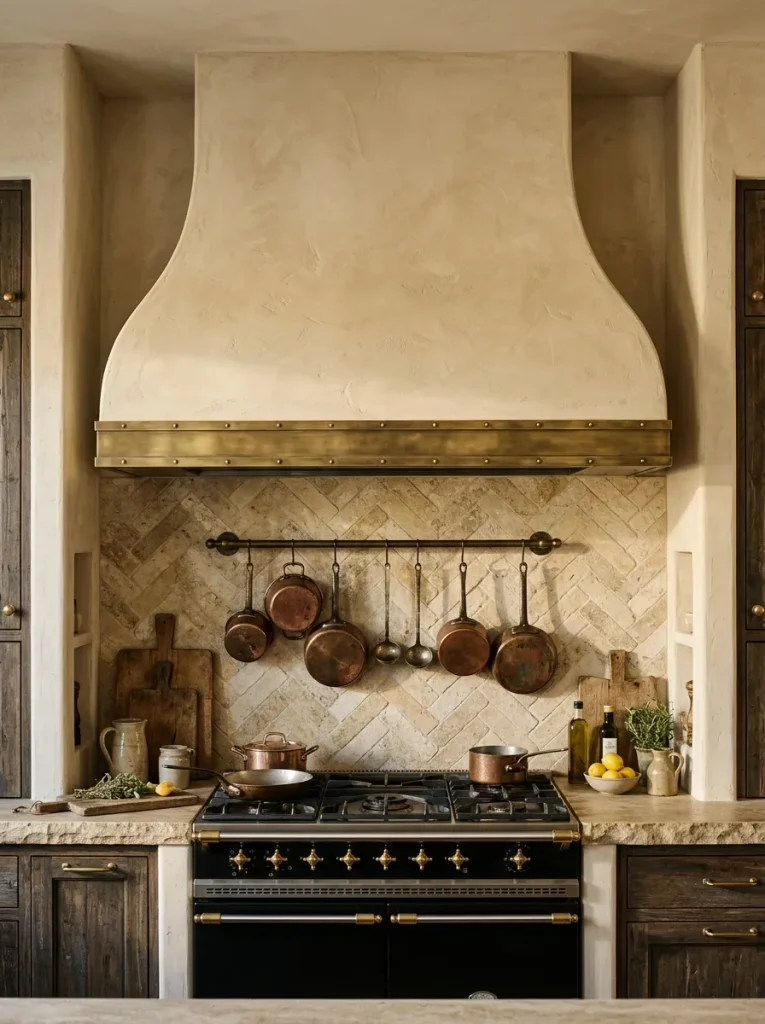
Match the hood finish to your backsplash or cabinets for a built in look, or contrast it with plaster or metal for drama. Choose a hood at least as wide as your cooktop, and go a few inches wider if you cook often. Always check the airflow rating before falling for the shape.
A bare wall above the stove is a missed chance. A sculpted hood draws the eye upward and makes the ceiling feel taller. Plaster, brass, and wood wrapped versions each bring a different mood. Powerful ventilation matters too, since a hood that looks great but clears smoke slowly will frustrate you daily.
Butler’s Pantry Nook
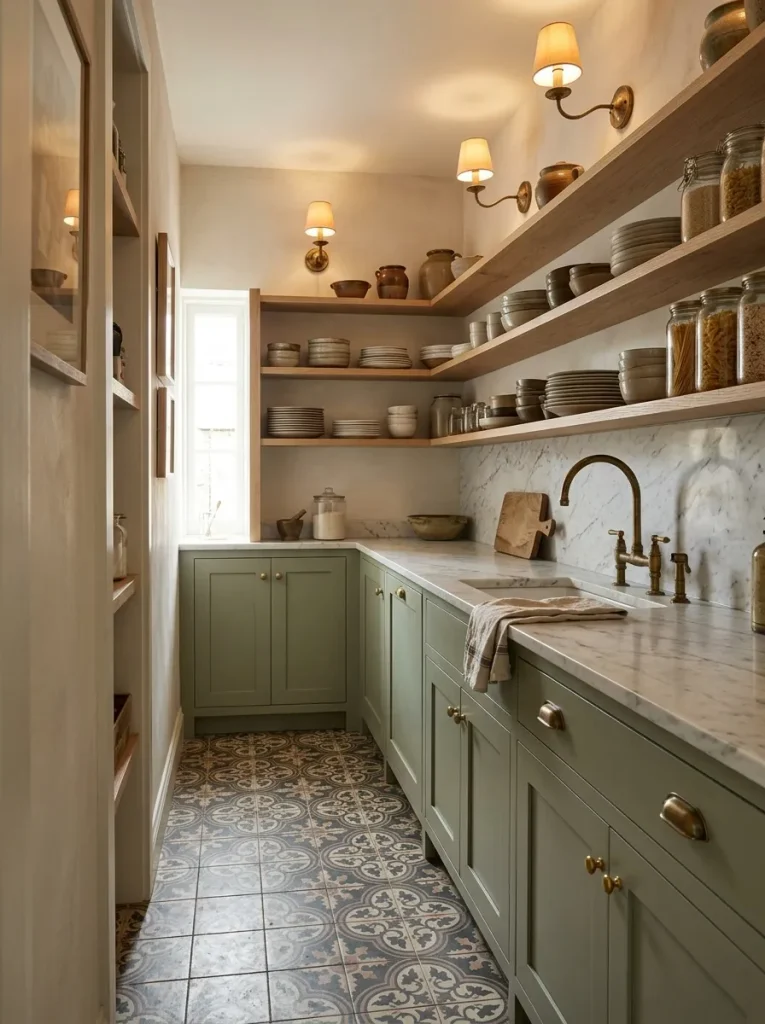
BEFORE: Dirty pots, party platters, and small appliances crowd the main counters just as guests arrive. Every cooking session ends with a pile that has nowhere to go.
AFTER: A small side room with its own sink and counter absorbs the mess. The main kitchen stays clear, and hosting feels calm instead of chaotic.
Line one wall with a counter, a compact sink, and a few deep drawers, then close the door on it during dinner. I’ve seen families use this space for years as a staging zone for holiday meals. Pick a bold cabinet color here, since it is a hidden spot where drama is welcome.
Pot Filler Faucet
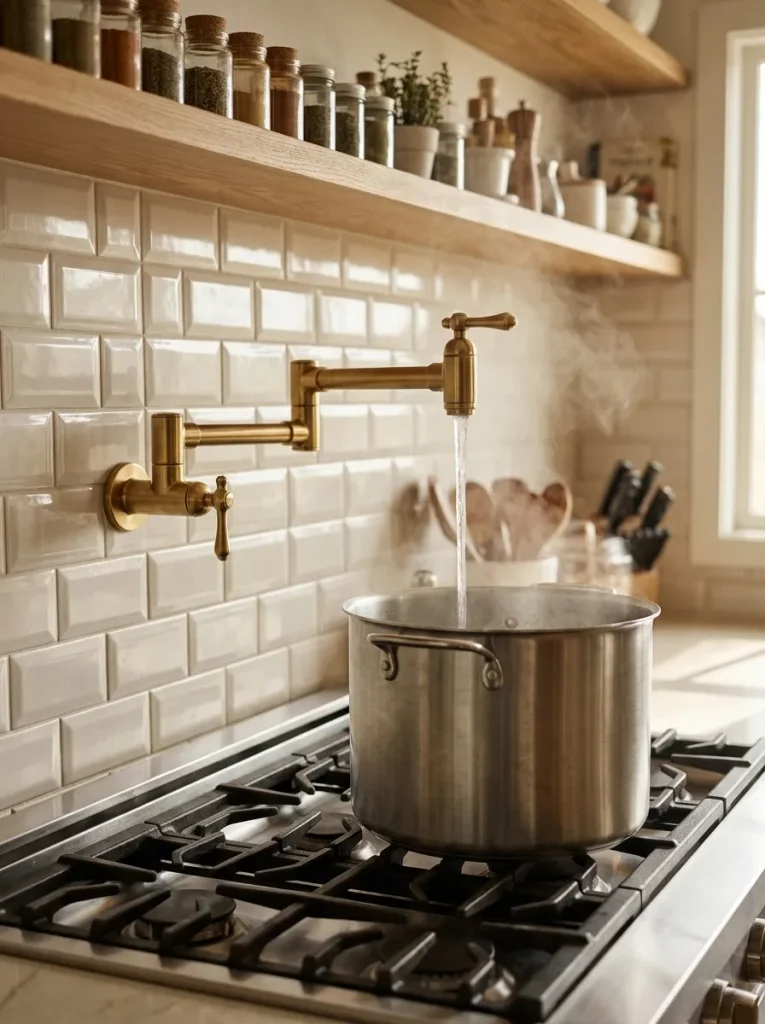
- Mount the filler on the wall centered over the burners, about 12 to 15 inches above the cooktop.
- Hire a licensed plumber to run a dedicated cold water line behind the wall.
- Choose a folding two joint arm so it reaches the back burners and tucks flat when idle.
- Match the finish to your sink faucet and cabinet hardware.
- Add a shutoff valve at the wall so repairs stay simple later.
Hauling a full stockpot across the kitchen gets old fast. A filler tap removes that chore and saves your back, wrists, and floors from spills. One pasta night shows the difference clearly. Plan the line during a renovation, since opening walls later costs far more.
Integrated Panel Appliances
| Point | Panel Ready Appliances | Standard Stainless |
|---|---|---|
| Look | Blends into the cabinetry | Stands out as metal |
| Fingerprints | Hidden behind wood or paint | Needs frequent wiping |
| Price | Higher, plus panel cost | Lower upfront |
| Resale appeal | Strong in high end homes | Neutral |
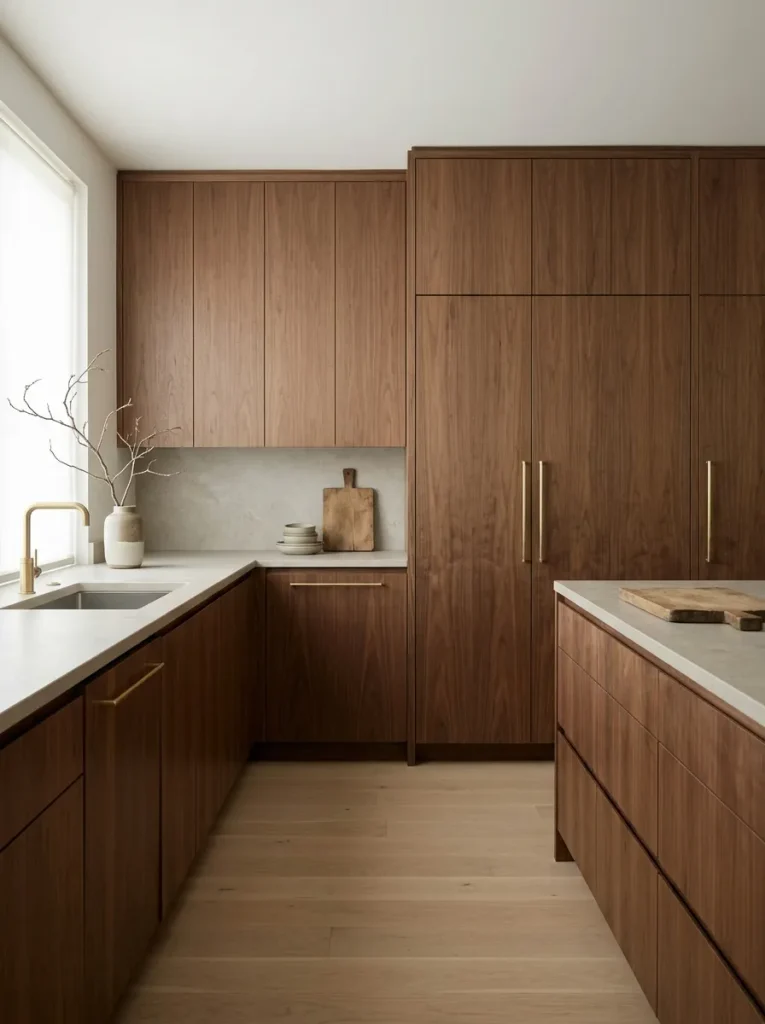
A kitchen that looks calm sells the dream. Panel ready appliances give you one clean wall of cabinetry instead of a mix of metal boxes. I’ve noticed that guests rarely guess where the fridge is. Order panels from your cabinet maker so the grain and color match exactly.
Marble Slab Backsplash
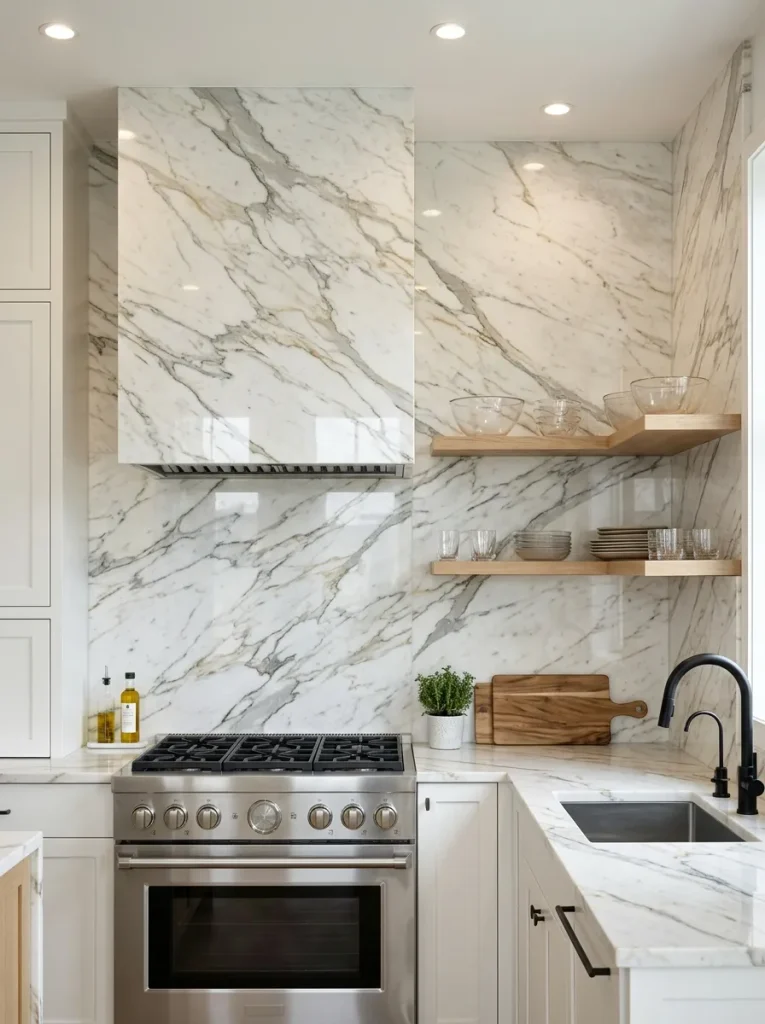
DO:
- Match the backsplash slab to the countertop for one continuous look.
- Choose a honed finish if you cook with a lot of oil and splatter.
- Seal the stone before installation and again every year.
- Plan outlet cutouts with your installer before cutting begins.
DON’T:
- Don’t pick a heavily veined slab if you also love busy cabinets.
- Don’t skip checking the slab in person under daylight.
- Don’t use harsh acidic cleaners on the surface.
A single stone wall replaces dozens of grout lines with one clean sweep of pattern. It also wipes down in seconds, which matters more than people expect. It can make a modest cabinet run look custom. Budget for extra stone, because waste from cutting adds up quickly.
Under Cabinet Lighting
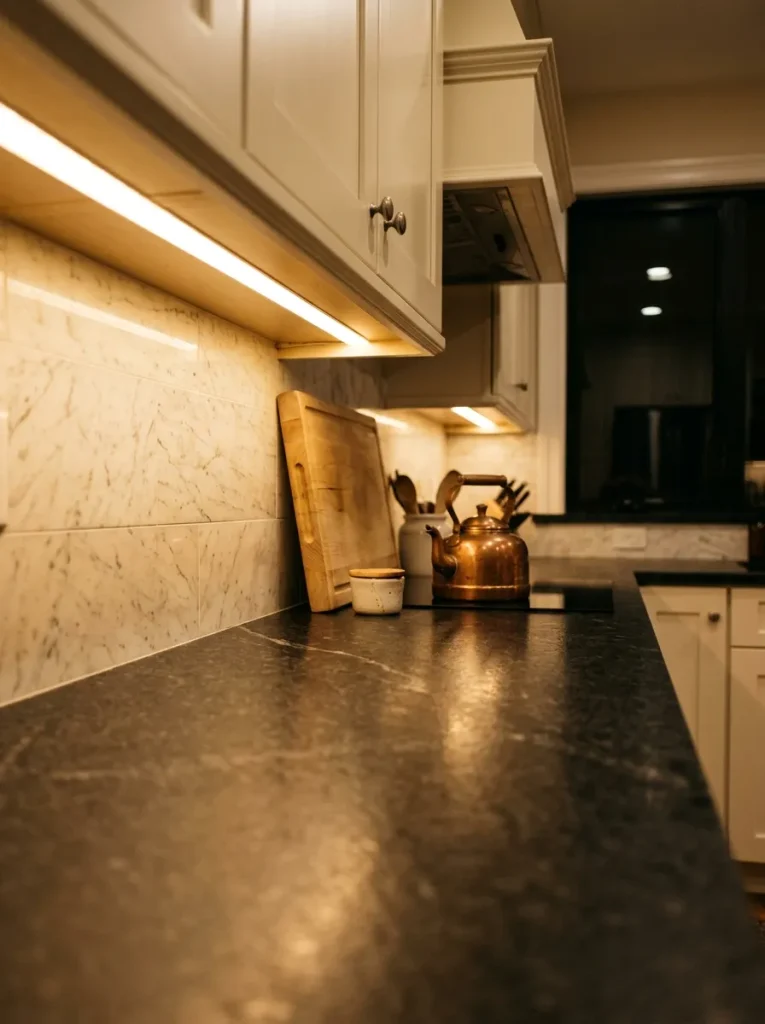
Cost: Low to medium | Time: One afternoon with a plug in kit
Best For: Dark corners and prep zones
Skill Level: Beginner for plug in, electrician for hardwired
Result: Brighter counters and a hotel style glow
Overhead lights cast shadows right where you chop and slice. Strips tucked under the cabinets fix that and add depth after dark. I’ve tried both cheap and quality kits, and the better ones are worth it for even color. Choose 2700K to 3000K warm white so the glow stays flattering.
Hidden Appliance Garage
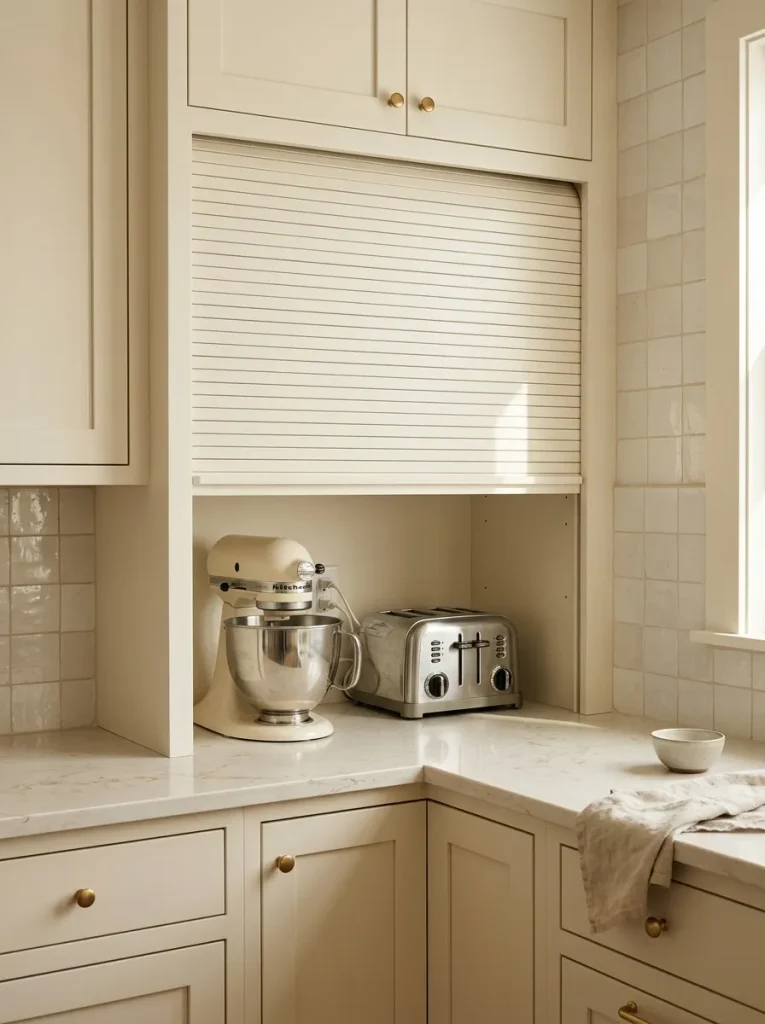
Clutter ruins a pretty counter faster than anything else. An appliance garage hides the toaster, blender, and mixer behind a pocket door or roll up front. Outlets sit inside the cabinet, so every machine stays plugged in and ready the moment you need it.
Place it near the main prep zone and make it at least 18 inches deep for a stand mixer. Add a small vent or gap at the back so heat from toasters escapes. In my experience, the first morning without a crowded counter is when people finally understand the appeal.
Walk In Pantry
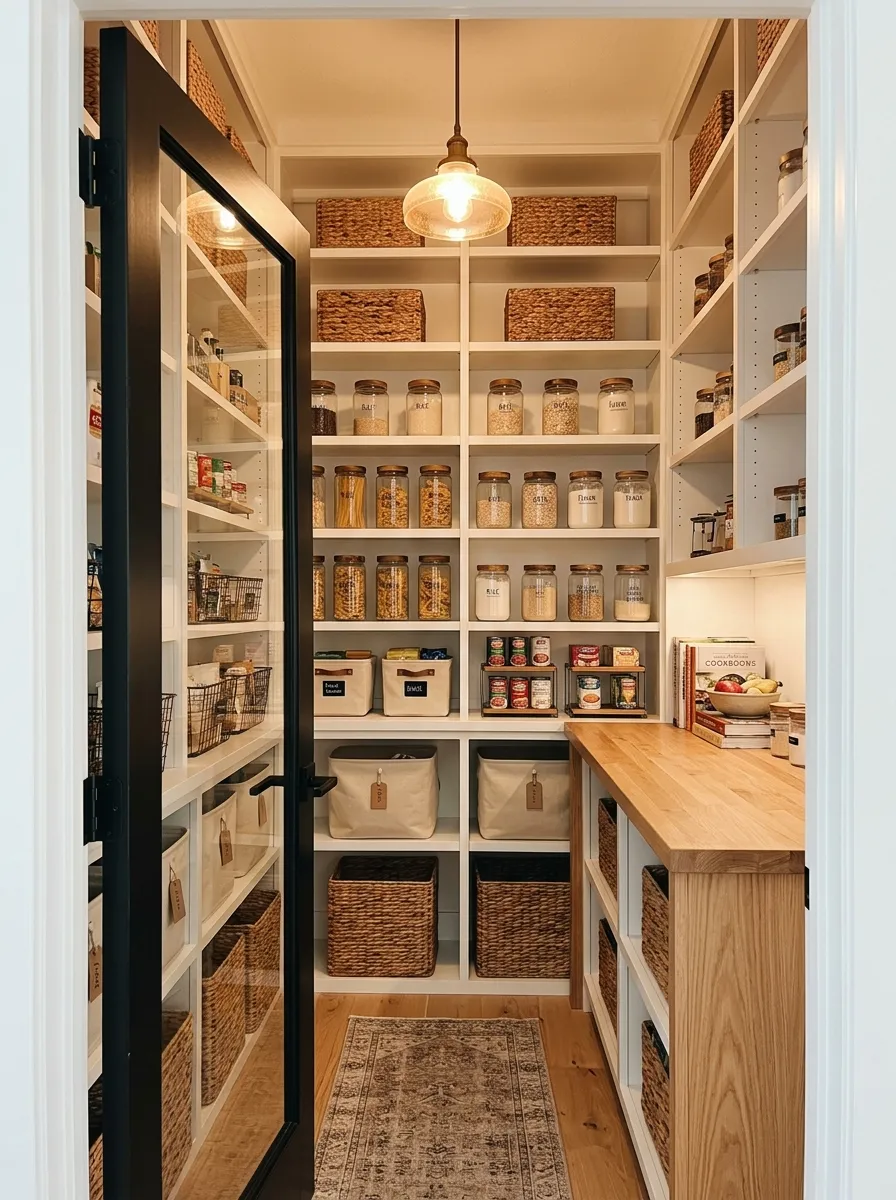
- Shelves 12 to 16 inches deep keep items visible instead of buried.
- Install a counter at waist height for small appliances, with outlets just above it.
- Decant dry goods into matching glass jars with labels so you can check stock at a glance.
- Add a motion sensor light so your hands stay free while carrying groceries.
- Choose a pocket or sliding door so swing space is not wasted.
Great pantries feel like a small boutique for your food. Everything has a home, and nothing disappears behind a dark shelf. Even a closet sized space works when you build vertically. That’s why many organizers recommend shallow shelves, since you waste less food and shop smarter.
Brass Hardware Details
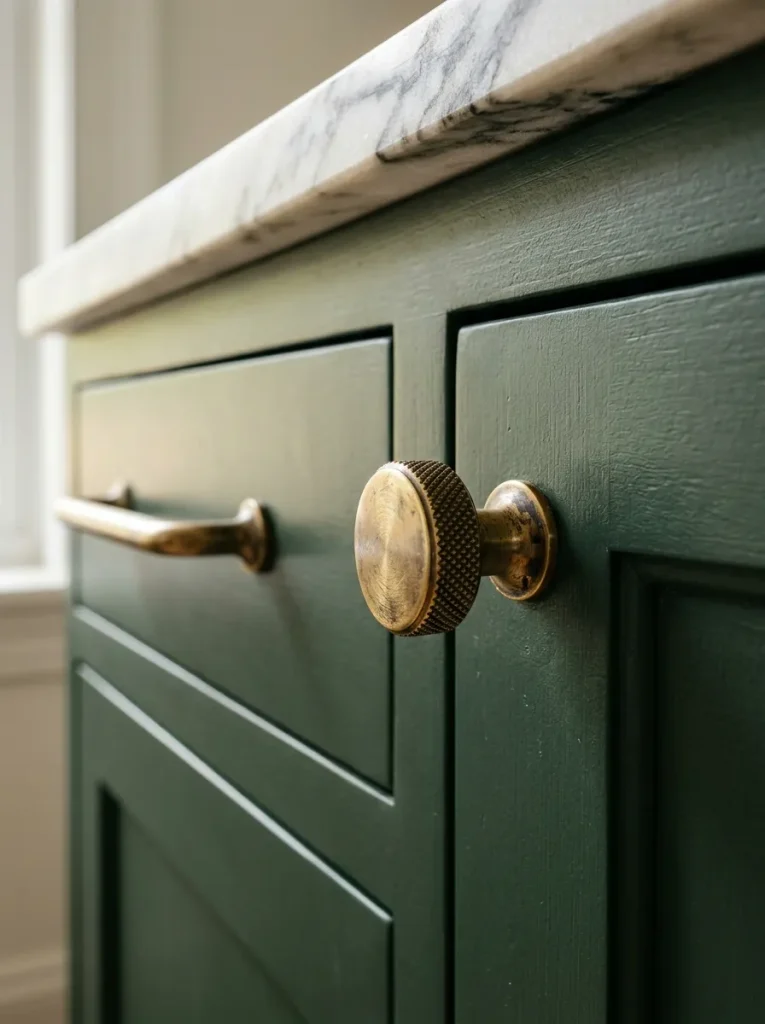
Quick Tip:
Use knobs on doors and long pulls on drawers, and keep one finish throughout. Place pulls 2 to 3 inches from the cabinet edge for a balanced look. Order one sample set first and test it in your kitchen light.
Hardware is the jewelry of the kitchen. It is a small cost compared to stone or appliances, yet it changes how every cabinet feels in your hand. Solid brass develops a soft patina over time, while lacquered versions stay bright. Choose based on how much polishing you want to do.
Double Island Layout
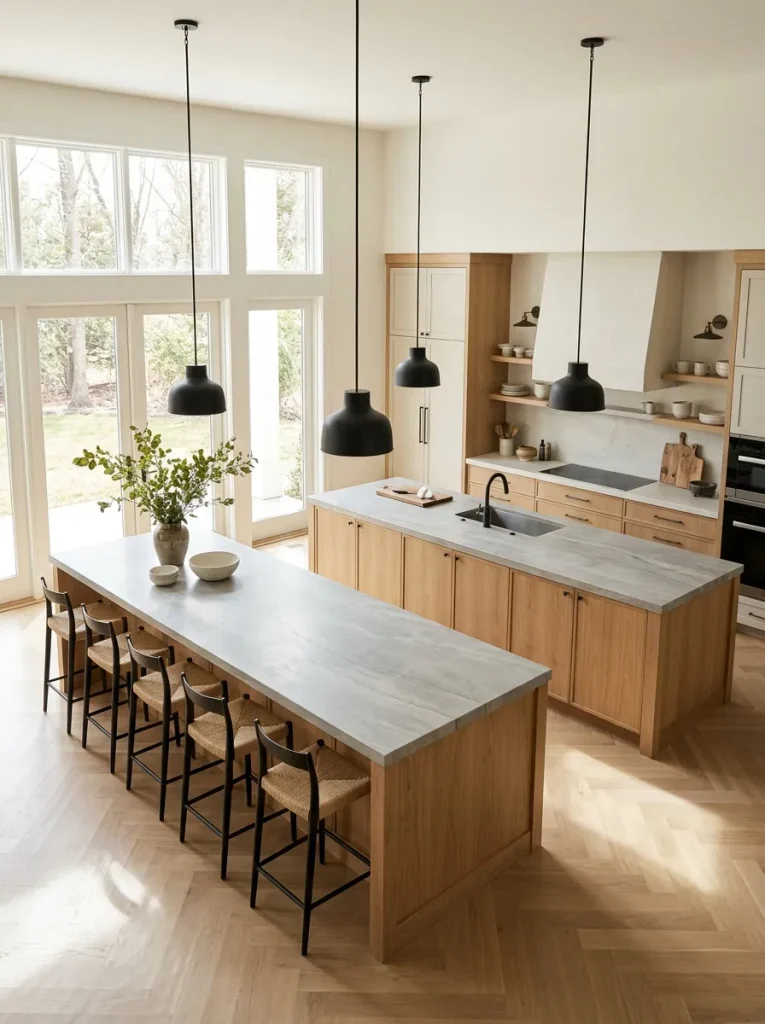
BEFORE: One large island tries to be a prep zone, a dining table, and a homework desk at once. Traffic jams form whenever two people cook together.
AFTER: Two islands split the jobs. One becomes the clean prep and cooking zone with the sink, and the other turns into a seating spot for guests, so everyone has room.
Leave at least 42 inches of walkway between the islands and surrounding cabinets, and 48 inches if two cooks work together. Keep the heights consistent, or step the seating island up for contrast. It only works in a room around 16 by 20 feet or larger, so measure before you dream.
Warm Wood Cabinetry
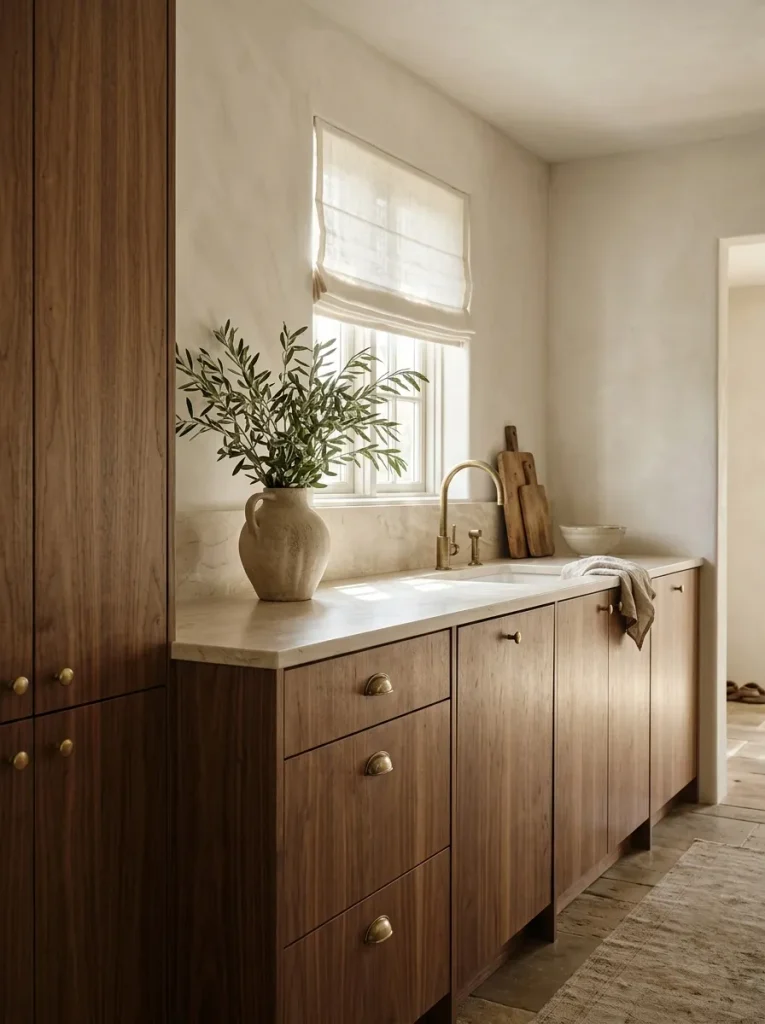
- Pick one wood species, such as walnut, white oak, or rift cut oak, and stick with it.
- Ask for vertical grain on tall doors so the pattern runs clean from top to bottom.
- Request book matched veneer on the fridge wall for a custom look.
- Finish with a matte clear coat that protects the wood without making it shiny.
- Pair it with light stone or plaster to balance the warmth.
Wood brings warmth that painted cabinets rarely match. It also hides daily wear better than a flat white door. Sample boards in your own kitchen light before ordering, since walnut can look chocolate brown in one room and noticeably cooler in another. That small test saves a costly surprise.
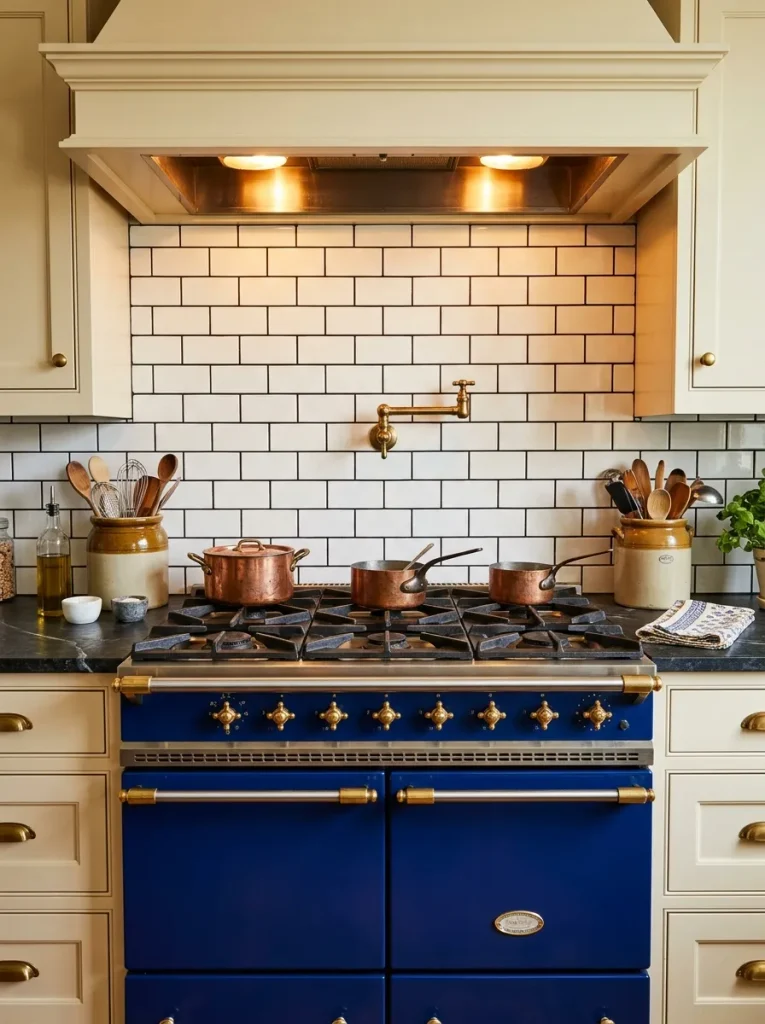
Pro Style Range
| Point | Gas Range | Induction Range |
|---|---|---|
| Heat control | Visible flame, instant feel | Precise, fastest boil |
| Cleaning | Grates and burners to scrub | Flat glass wipes clean |
| Air quality | Needs strong ventilation | Cooler, cleaner air |
| Cost | Wide price range | Often mid to high |
Serious cooks usually have a strong opinion here. Gas gives you flame you can see, while induction heats pans faster and keeps the kitchen cooler. Plenty of owners prefer induction once they wipe the surface in seconds. Test both in a showroom with your own pan before deciding.
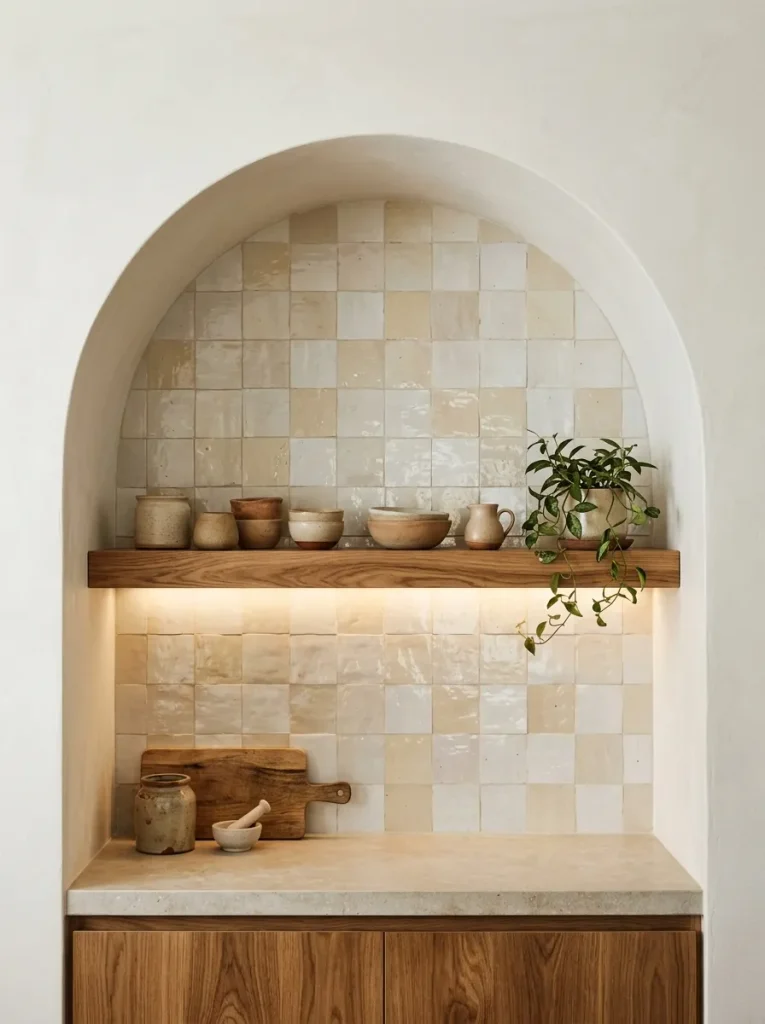
Arched Display Alcove
DO:
- Keep the arch width between 30 and 42 inches for balanced proportions.
- Light the inside with a hidden strip or small spotlight.
- Style it with three to five pieces in related colors.
- Match the arch curve to other curves in the room.
DON’T:
- Don’t fill the alcove until it looks crowded.
- Don’t mix finishes that clash with your faucet and pulls.
- Don’t cut into a plumbing or wiring wall without checking first.
An arch softens a kitchen full of straight lines. It adds a gentle curve that guides the eye and gives a small collection a proper home. Because it is built into the wall, it keeps counters clear. Plan the niche early with your builder, since cutting later means opening and repairing finished walls.
Fluted Island Panels
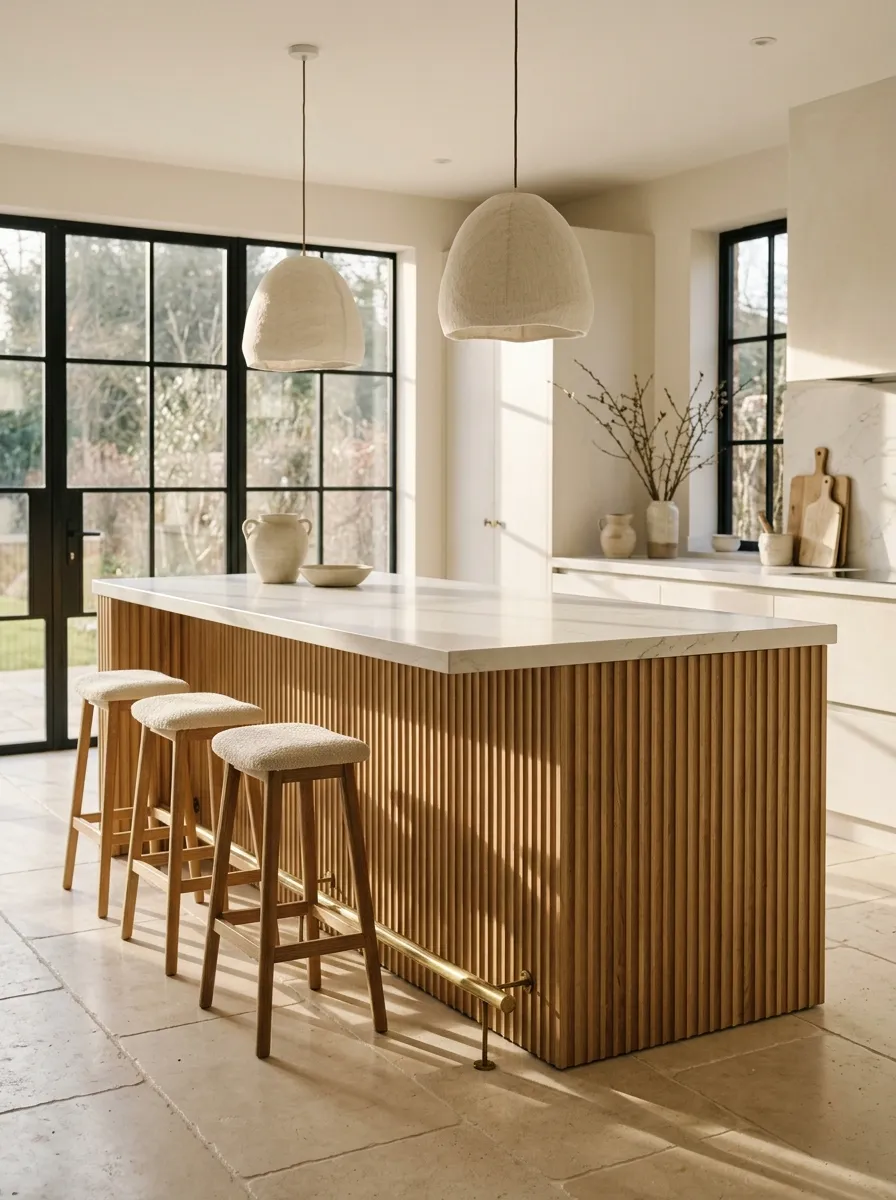
Cost: Medium | Time: One to two days for a carpenter
Best For: Islands, range hoods, and bar fronts
Difficulty: Moderate, since spacing must line up
Works In: Modern, organic, and traditional kitchens
Flat island sides can feel plain, while ridges catch light and add depth. Choose rounded or flat flutes in solid wood, painted MDF, or plaster. Fluting looks best on one feature, not every surface. Pick the island or the hood, and let the rest of the kitchen stay calm and simple.
Statement Pendant Lights
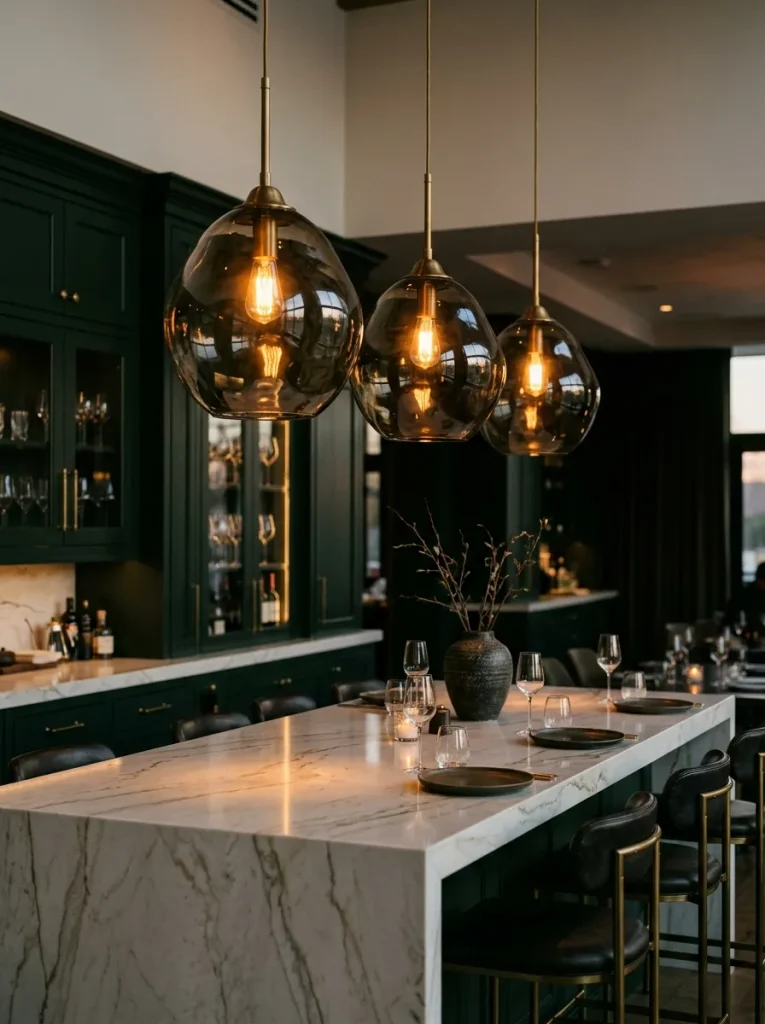
Hang them 30 to 36 inches above the counter, spaced about one shade width apart. Measure from the countertop to the bottom of each shade. Put them on a dimmer. I’ve learned that the dimmer matters more than the fixture, because bright pendants make an elegant room feel like a waiting room.
Wine Wall Display
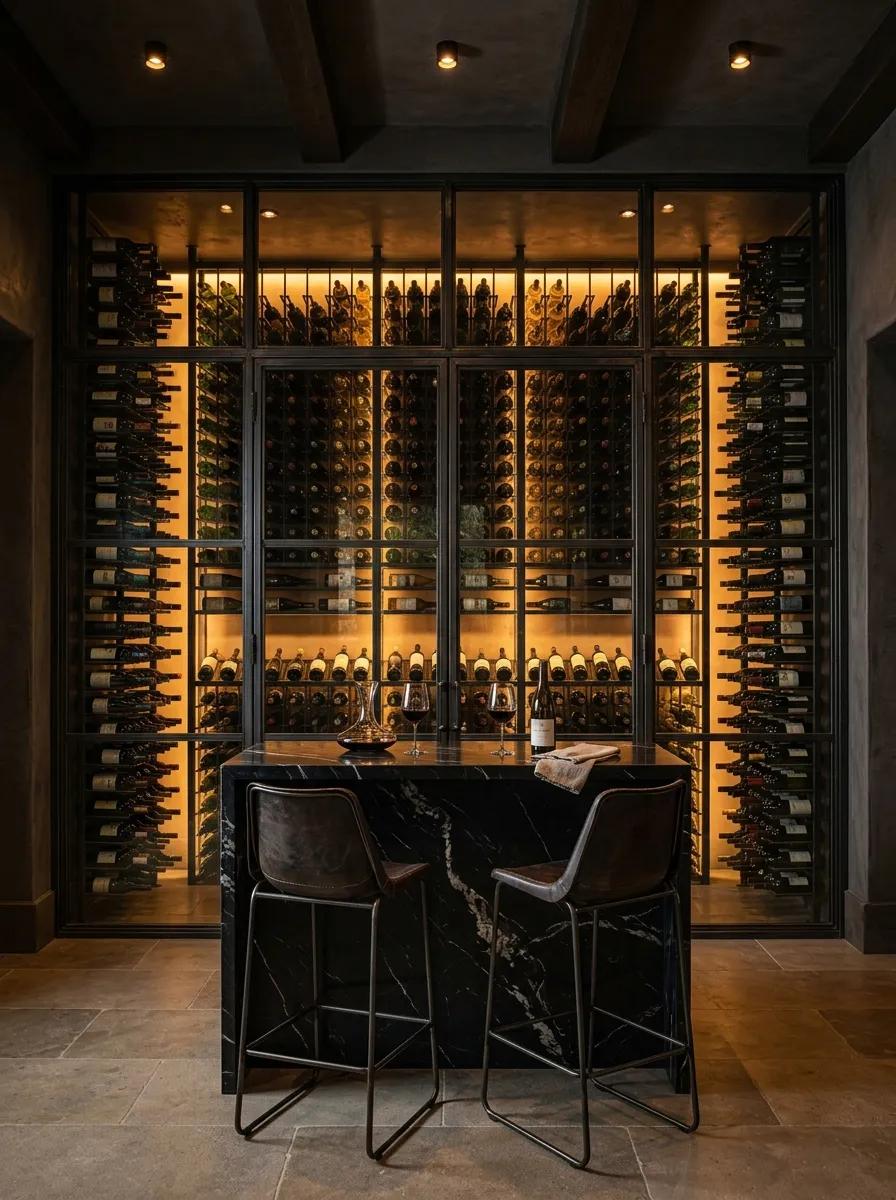
- Choose a dual zone wine fridge or a glass enclosed wall, and keep temperatures between 55 and 58 degrees Fahrenheit.
- Use UV filtering glass because sunlight spoils wine over time.
- Store bottles on their sides so corks stay moist.
- Add warm backlighting so labels glow without heating the bottles.
- Leave room for glasses nearby, ideally in a closed drawer or rack.
Great display starts with good storage. Even a modest wall of 40 to 60 bottles feels special when it is lit well and organized by region or color. Keep the rest of the kitchen quiet so the bottles take center stage. Pick a spot away from the oven and dishwasher heat.
Dark Moody Palette
Quick Tip:
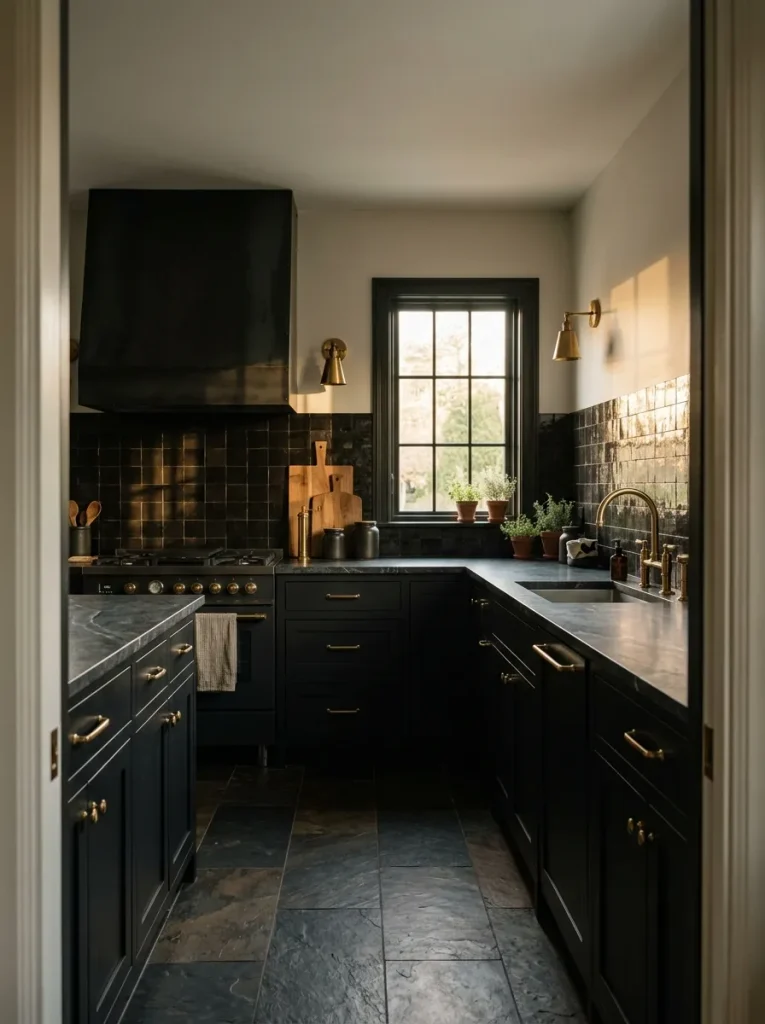
Layer at least three textures, such as matte paint, honed stone, and warm wood, so dark colors look rich instead of flat. Add warm bulbs and a brass accent to bring the glow. Test paint on a large board before committing.
Dark kitchens feel intimate, like a favorite restaurant. The key is light. Good windows, layered lighting, and a few warm metals keep deep green, navy, or charcoal from feeling heavy. In my experience, glossy tile or a mirror backsplash adds the sparkle that stops a dark room from swallowing itself.
Built In Coffee Bar
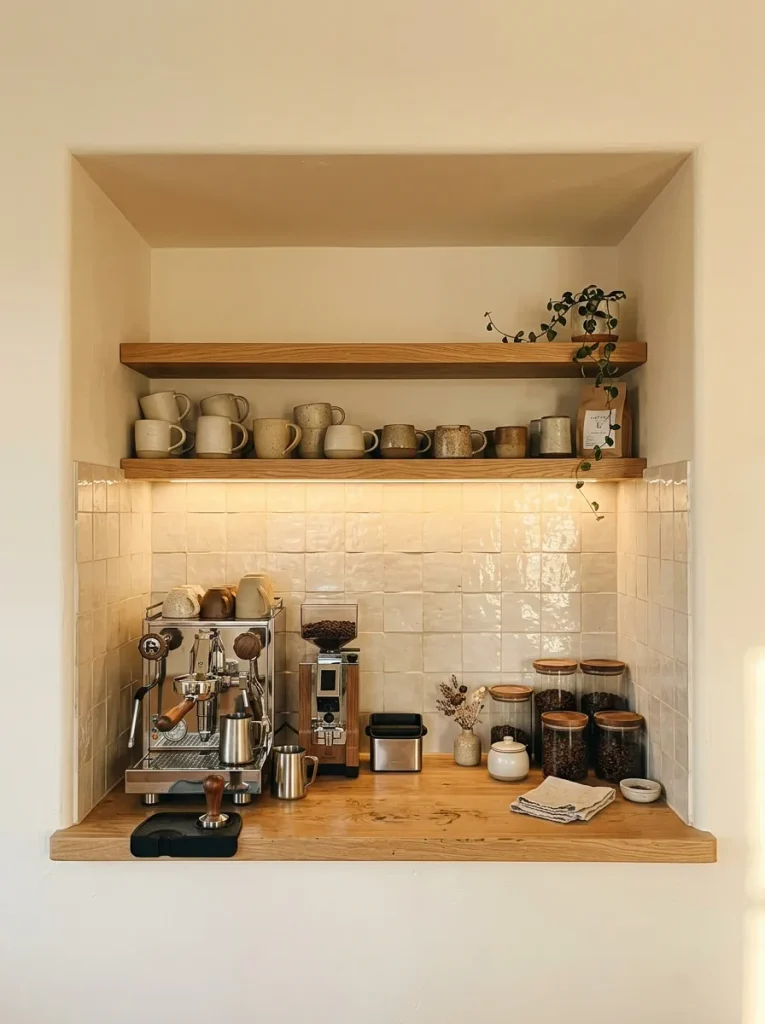
BEFORE: Mornings start with a coffee maker on one counter, mugs in another cabinet, and beans in a third. Everyone crowds the same corner while the kettle boils.
AFTER: A dedicated bar holds the machine, beans, mugs, and syrups in one spot. Morning traffic moves smoothly, and the main kitchen stays out of the way.
Place it near the sink or give it a dedicated water line. Add a deep drawer for filters and pods, plus an outlet hidden inside the cabinet. Keep a small tray for spills. It becomes the spot guests naturally gather around, so style it as carefully as the island.
Touchless Kitchen Faucet
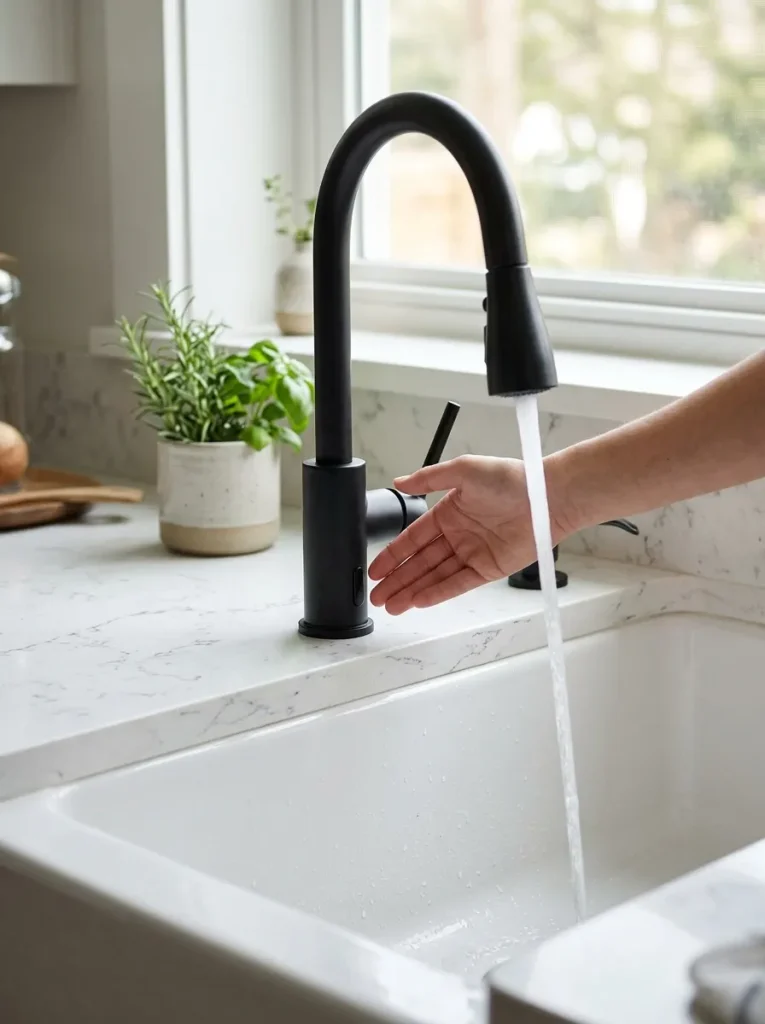
- Choose a model with a sensor on the spout and a manual handle as backup.
- Check the under sink space for the battery box or power adapter.
- Pick a finish that matches your hardware, such as brushed nickel or matte black.
- Have a plumber install it and set the sensor distance.
- Show everyone in the house the sensor range so it does not trigger by accident.
Sticky hands, raw chicken, and dough are where a sensor tap pays off. The handle stays clean, and you save water because it shuts off right away. Quality varies, so read reviews about sensor lag before buying. A good one feels instant and gives you one less thing to wipe after cooking.
Quartzite Countertops
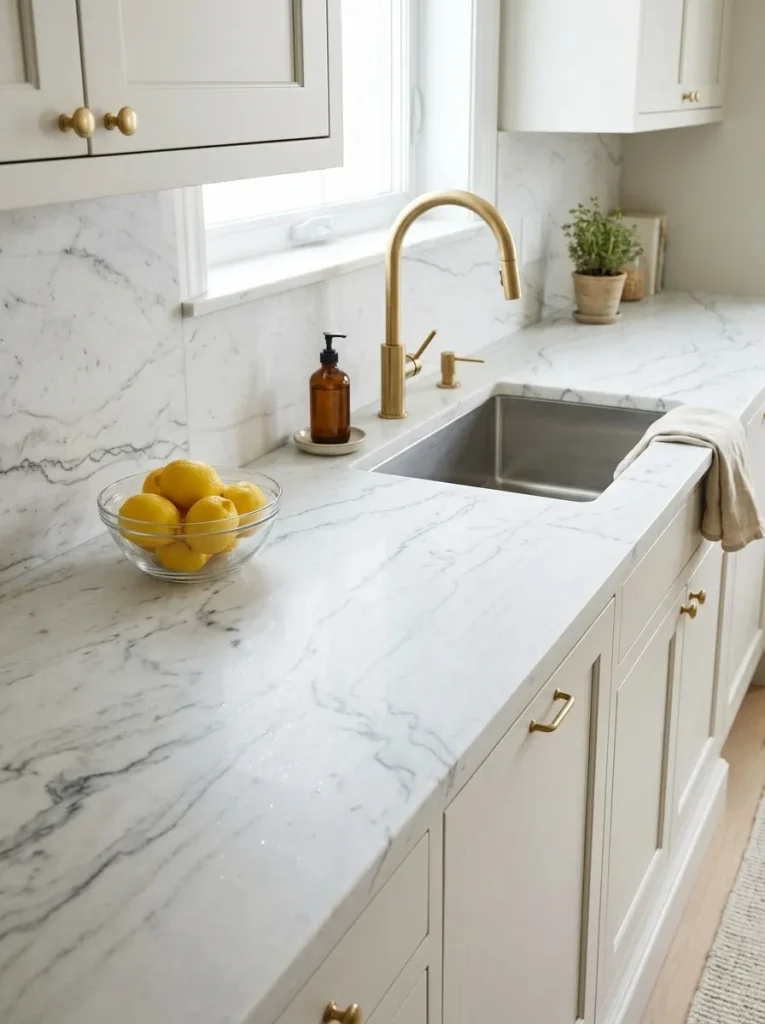
| Point | Quartzite | Marble |
|---|---|---|
| Durability | Very hard, resists scratches | Softer, scratches more easily |
| Etching | Highly resistant to acids | Etches from lemon and wine |
| Look | Soft veining, cool or warm | Classic dramatic veining |
| Upkeep | Seal once a year | Seal every 6 months |
Many shoppers want marble beauty without marble stress. Quartzite is a natural stone that gets close, and it handles daily wear and citrus better. Always scratch test a sample with a knife, because some stones sold as quartzite are actually softer. Buy from a supplier who lets you inspect the full slab.
Heated Stone Floors
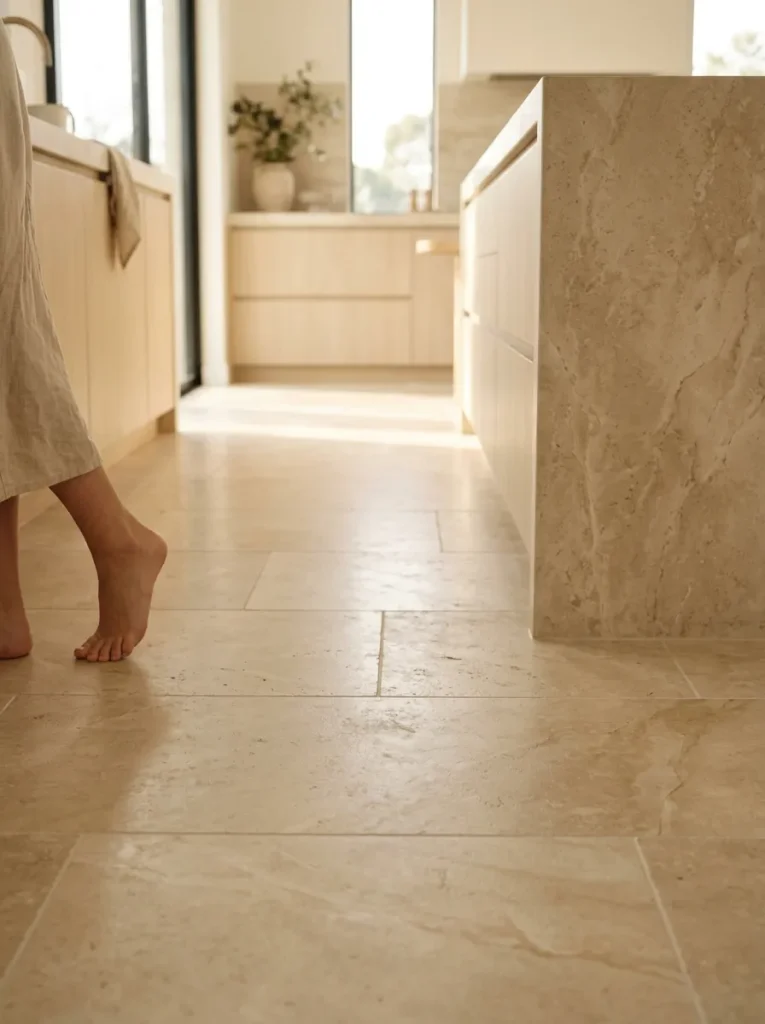
DO:
- Install electric mats under the tile in the cooking and sink zones.
- Add a programmable thermostat with a floor sensor.
- Use large format tiles with thin grout lines.
- Plan the system before the floor is poured or tiled.
DON’T:
- Don’t put heating under cabinets or the island base.
- Don’t skip a licensed electrician for the wiring.
- Don’t run it at full heat all day.
Cold tile in the morning is a small daily annoyance. Radiant heat fixes that and warms the room evenly without blowing air. It adds comfort most visitors never see but always feel. It is far easier to add during a renovation than after, so decide before the subfloor closes.
Exposed Ceiling Beams
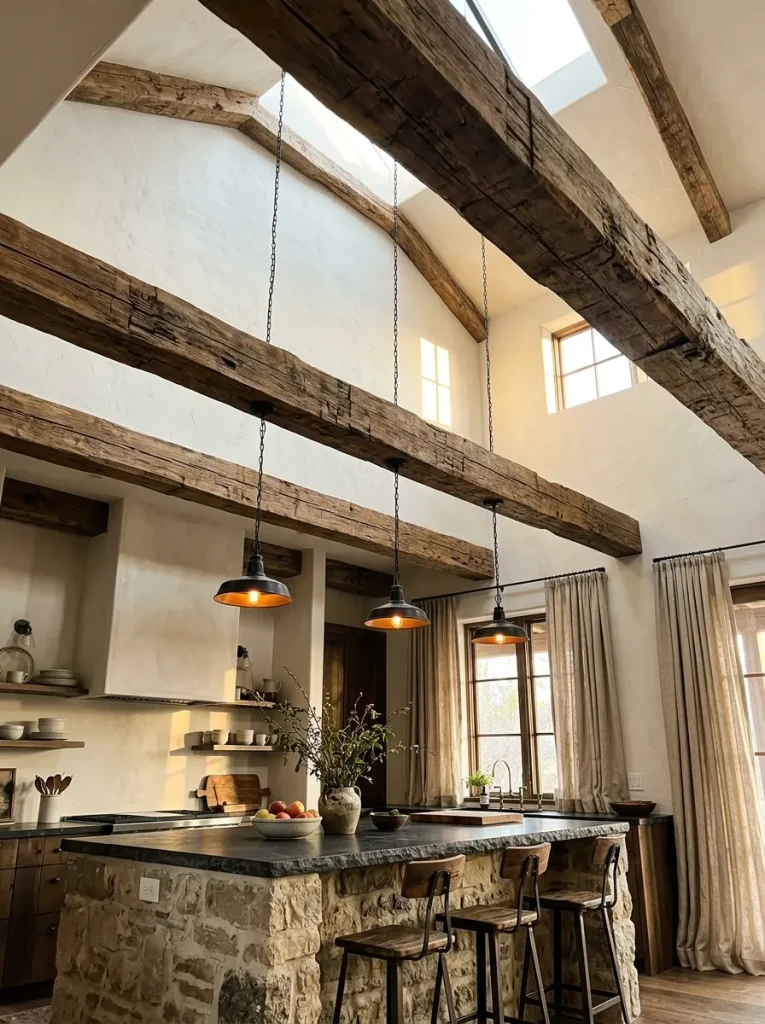
Cost: Medium for faux box beams, high for solid reclaimed
Time: Two to four days
Best For: Ceilings 9 feet or taller
Works In: Farmhouse, Tuscan, and modern organic kitchens
A ceiling is the fifth wall, and most kitchens ignore it. Beams add structure, texture, and a sense of age that new construction can’t copy. Lightweight hollow beams give the same look without structural work. Stain them one or two shades darker than the floor to keep the room balanced.
Upholstered Counter Stools
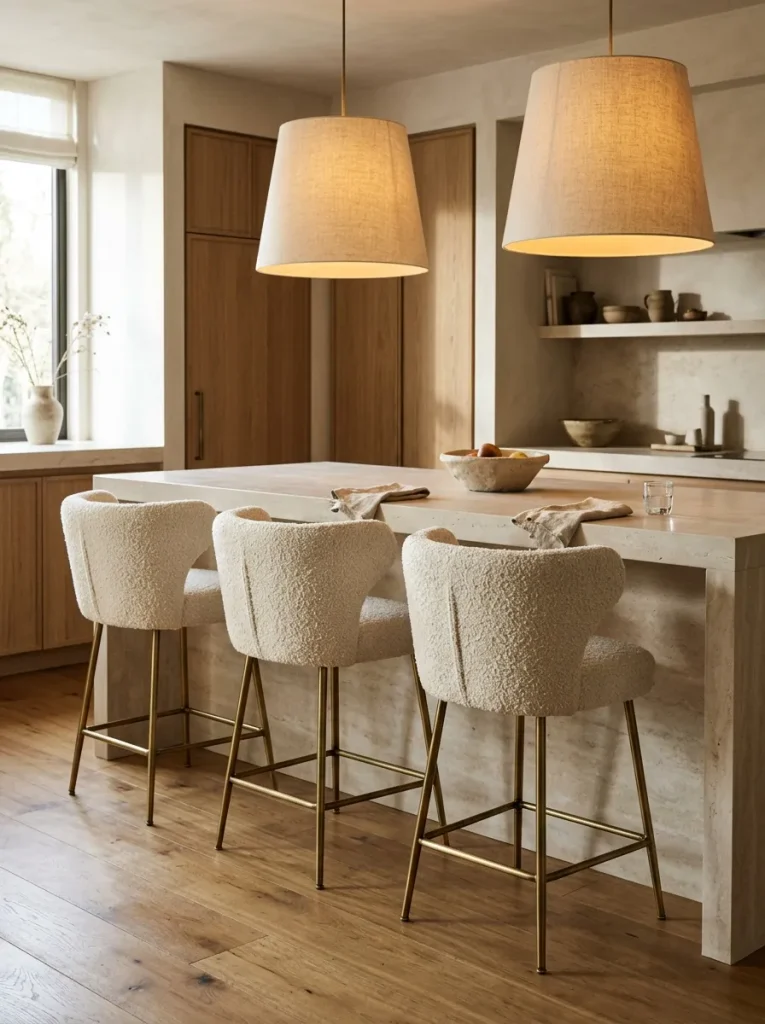
Comfort is the finishing touch most luxury kitchen ideas forget. A good stool invites people to stay, sip, and talk while you cook. Choose a seat with a back, arms if space allows, and a performance fabric that handles spills. Leather and boucle both work well.
Match the seat height to the counter, with 10 to 12 inches between the seat and the underside of the stone. Leave 24 inches of width per stool so elbows have space. Sit in one for ten minutes at the store, because comfort shows up quickly.
Conclusion
A beautiful kitchen is built from small, confident decisions. A pendant with presence, a slab of stone you love, a coffee bar that makes mornings easier. Each of these luxury kitchen ideas adds comfort and character you will notice every day.
Start with one upgrade that excites you and build from there. Save this post to your Pinterest board so you can come back when you are ready to plan. Share it with a friend who is dreaming up a new kitchen too.
I’ve seen how small changes like these can completely shift the way a home feels. Your dream kitchen is closer than you think.